Group your fences and gates into categories
Give the drawing tool's fence and gate pickers one tile per product category, in your own order, with your own picture or an icon from the Icon Library.
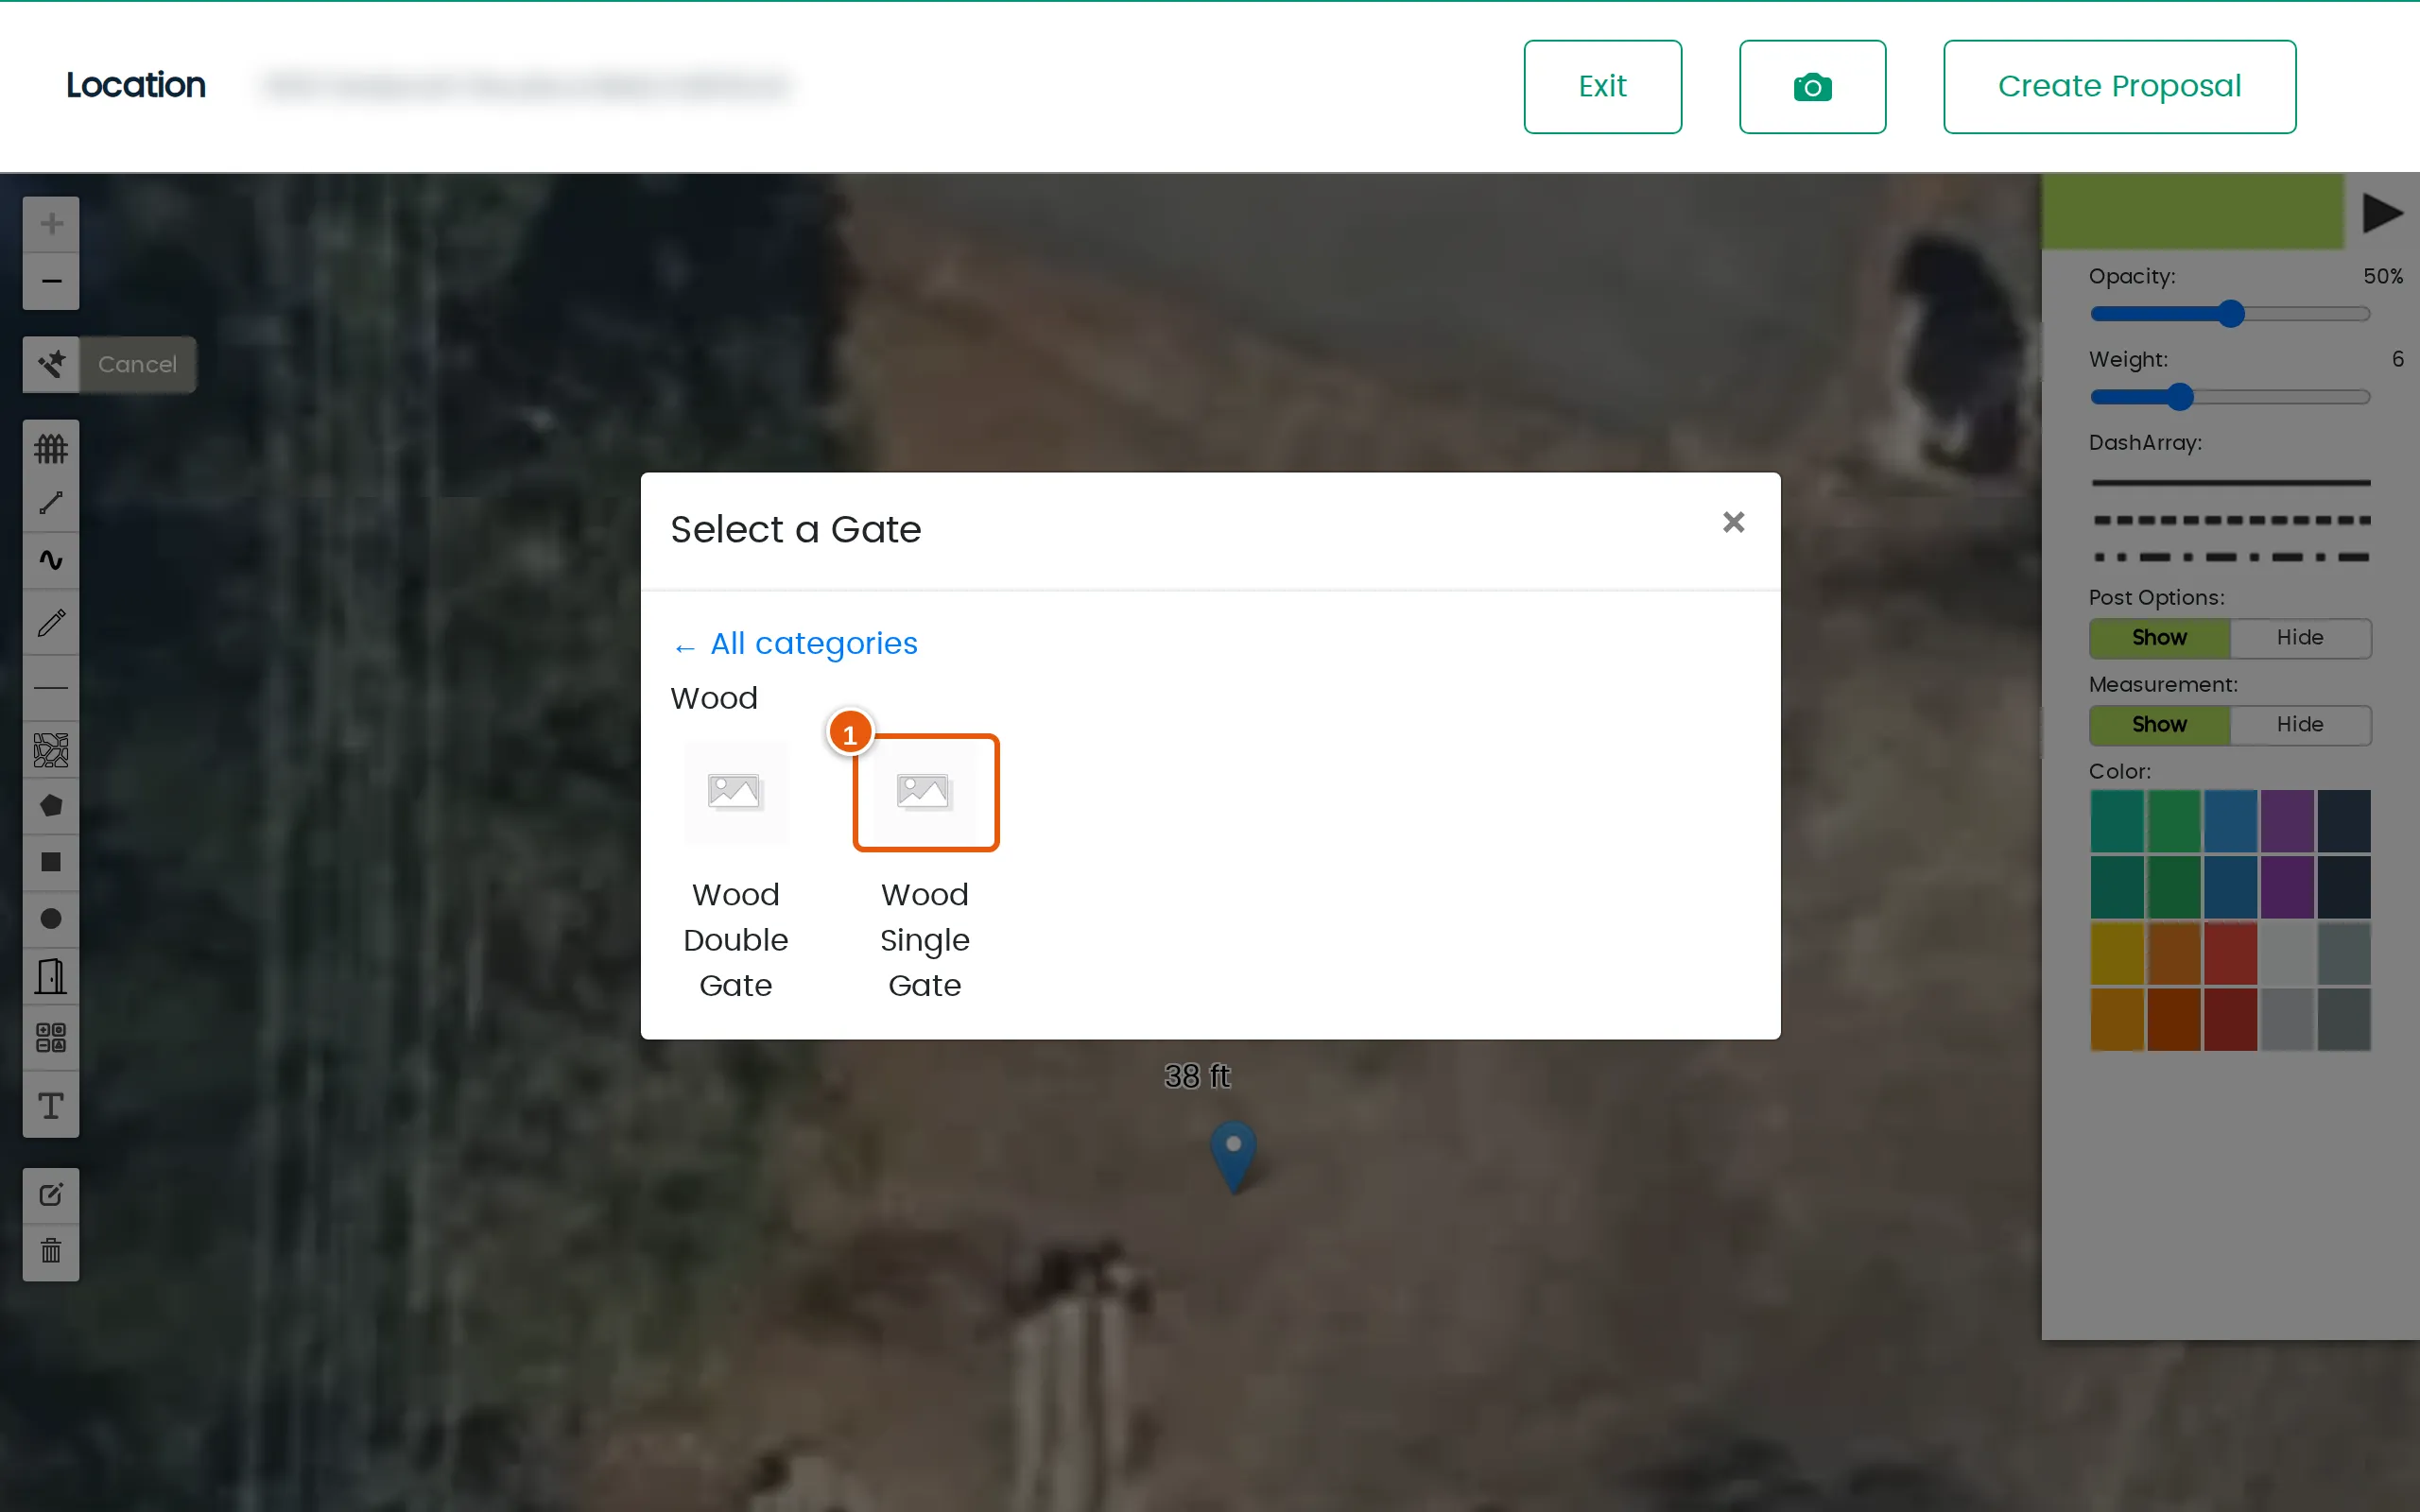
When your team draws, Select a Fence Product and Select a Gate both open on your product categories — one tile each, such as Wood or Vinyl. Clicking a tile shows what is in it. A template sits under the category of the fence it draws; a gate sits under its own category. Anything with no category is under Other, last.
Who can do this: Admin.
Order your categories and give them a picture
Section titled “Order your categories and give them a picture”-
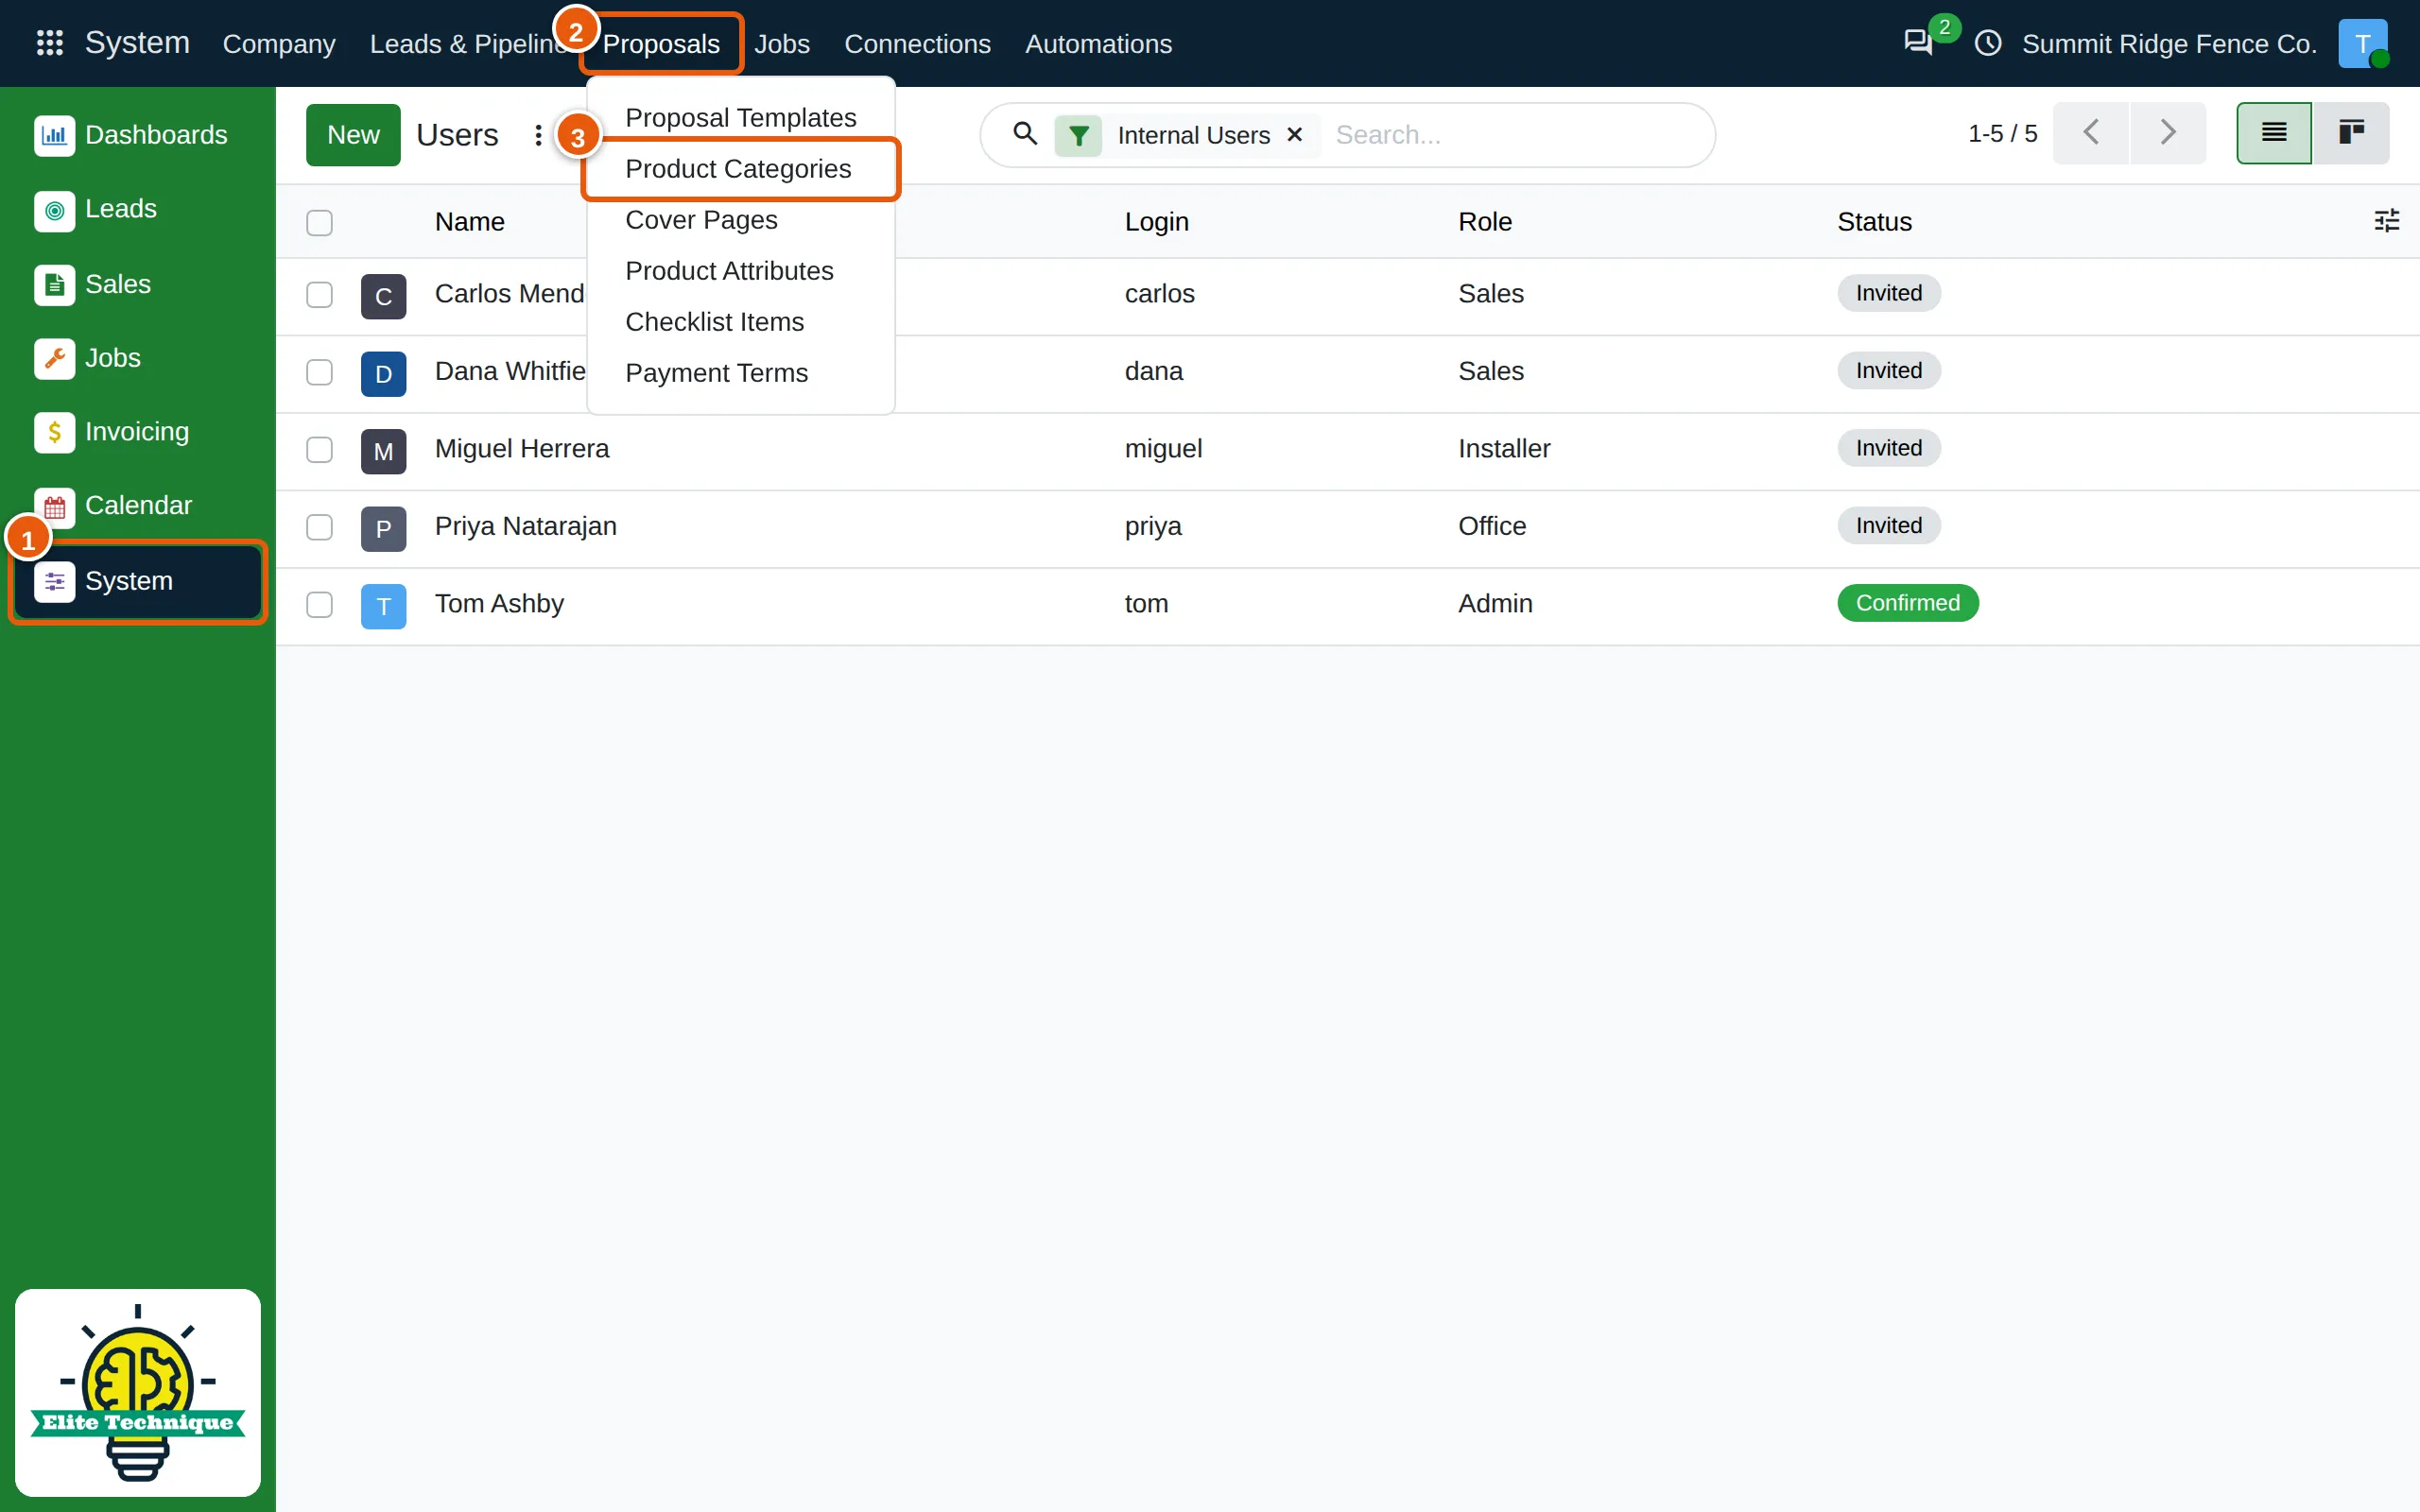
Click System (1) in the app bar on the left, then Proposals (2) at the top, then Product Categories (3).
-
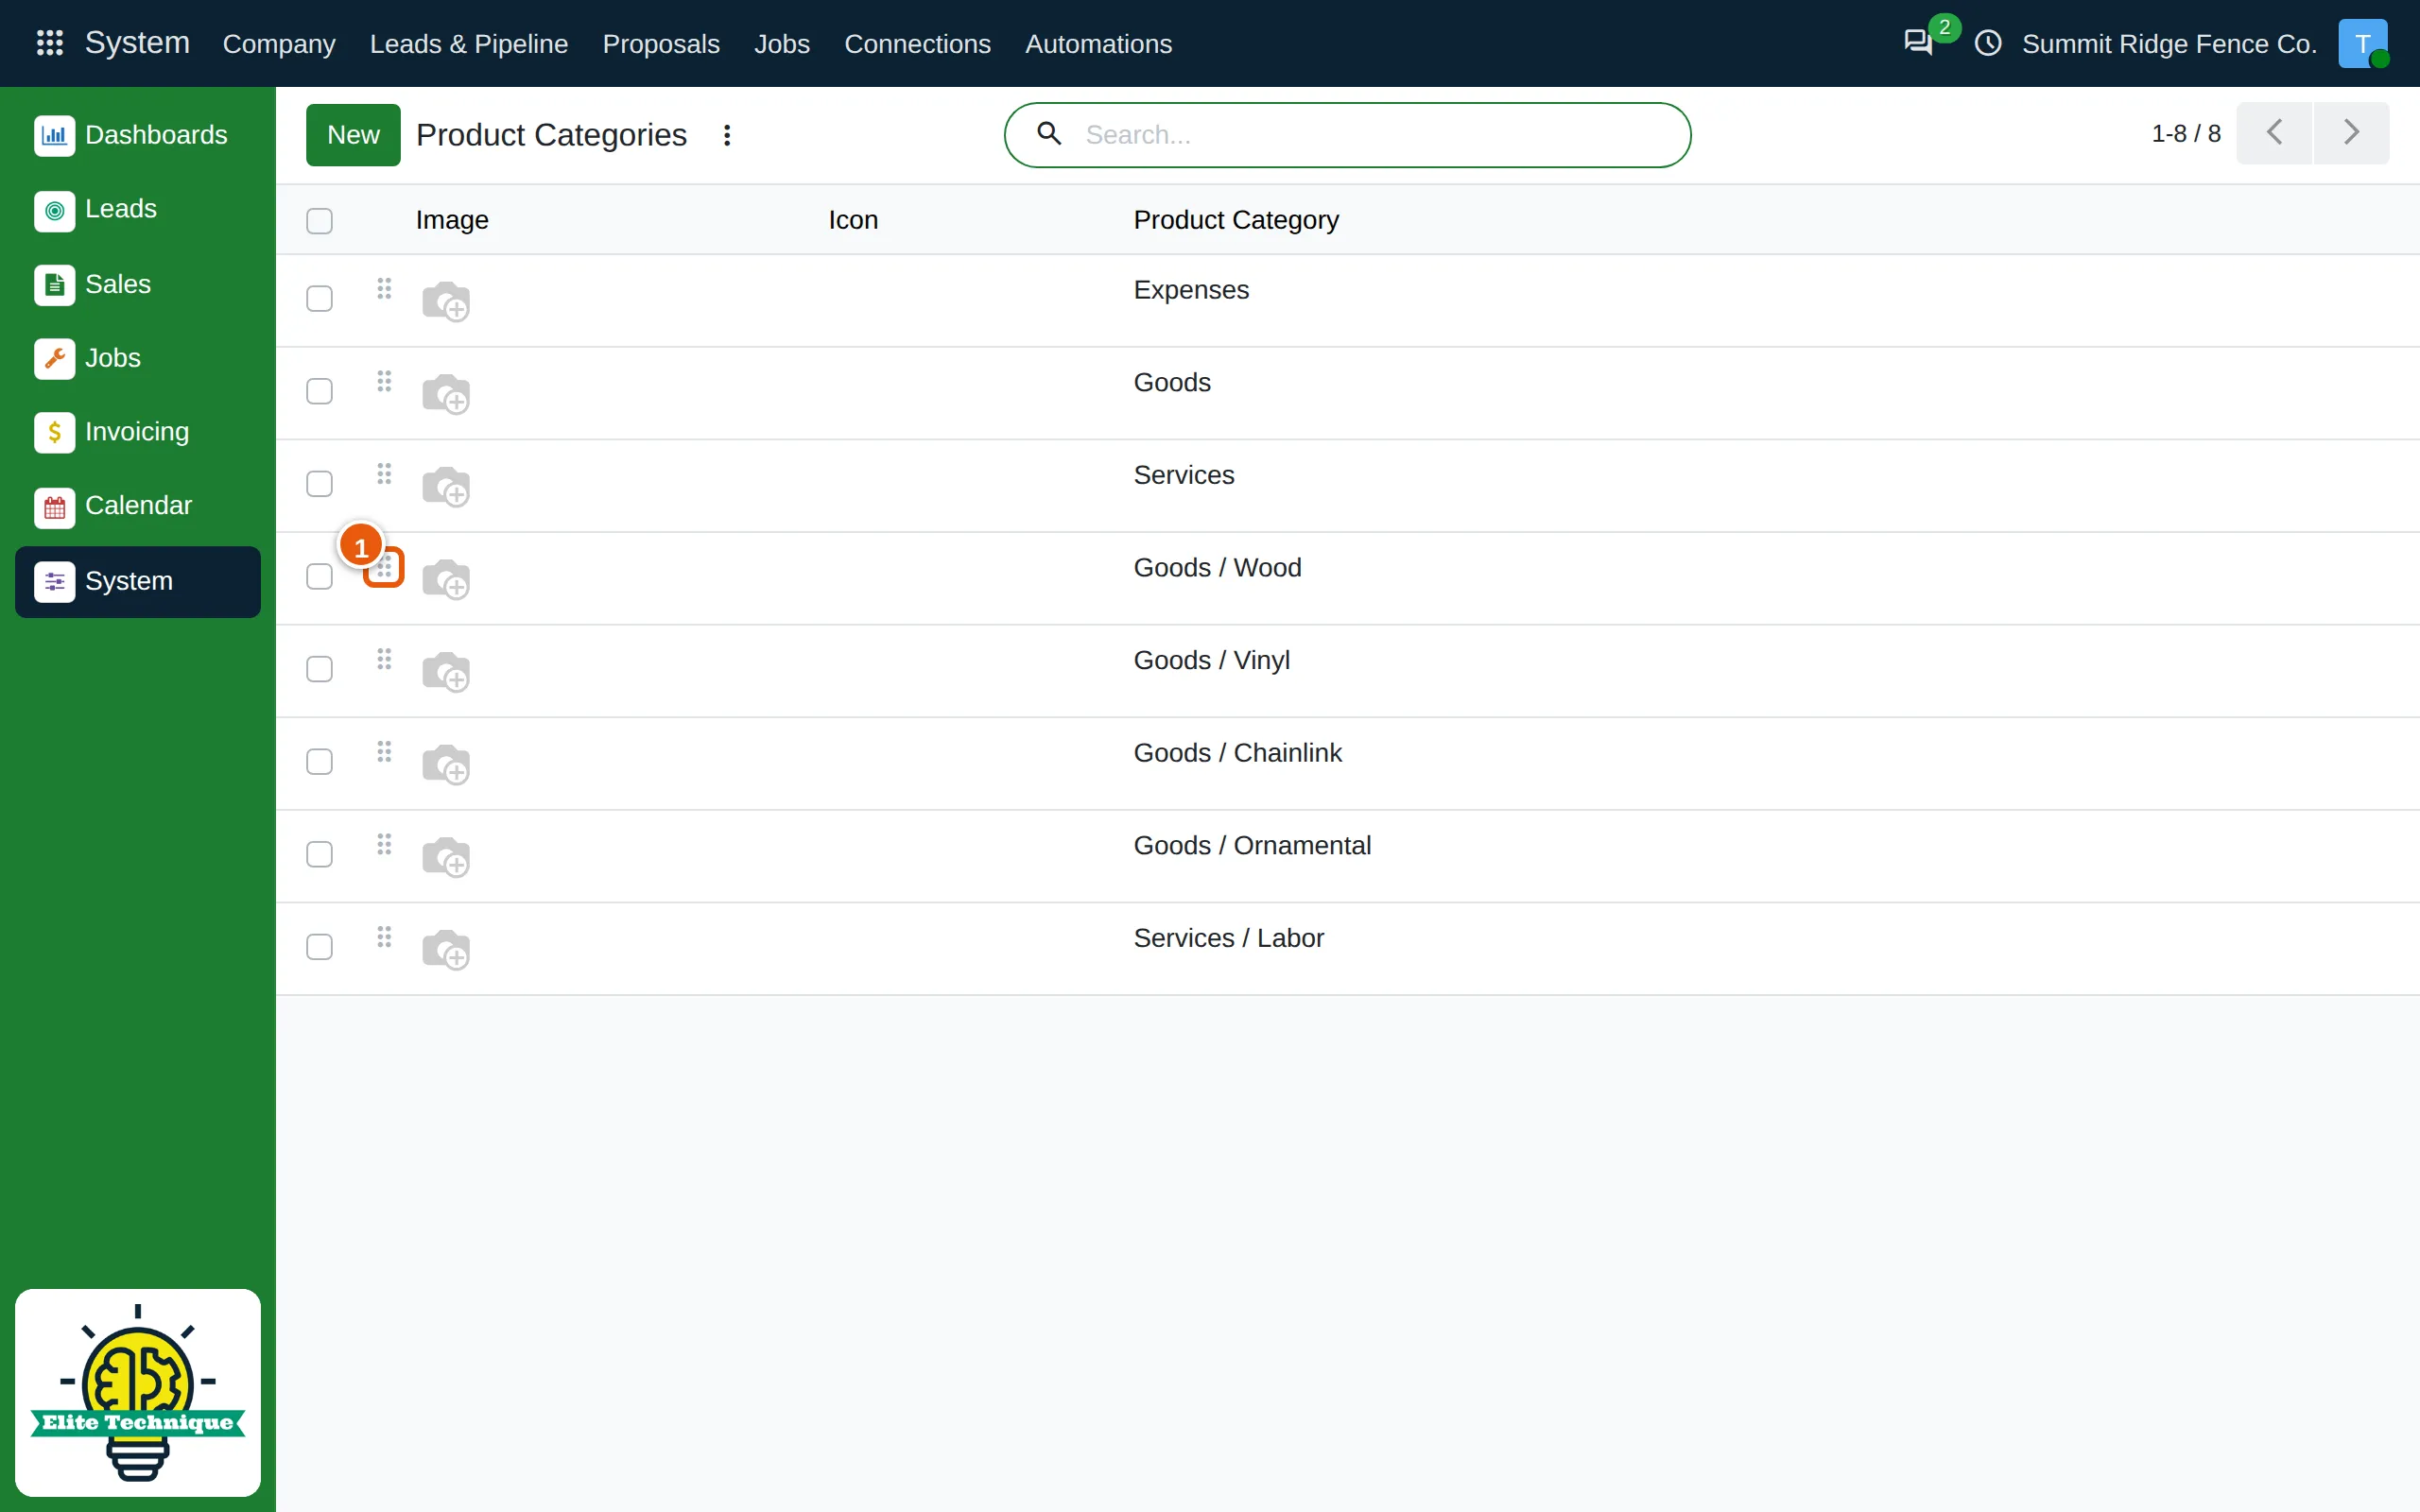
The list shows each category’s image, icon and name, in the order the drawing tool shows its tiles — Wood (1) comes before Vinyl, Chainlink and Ornamental.
-
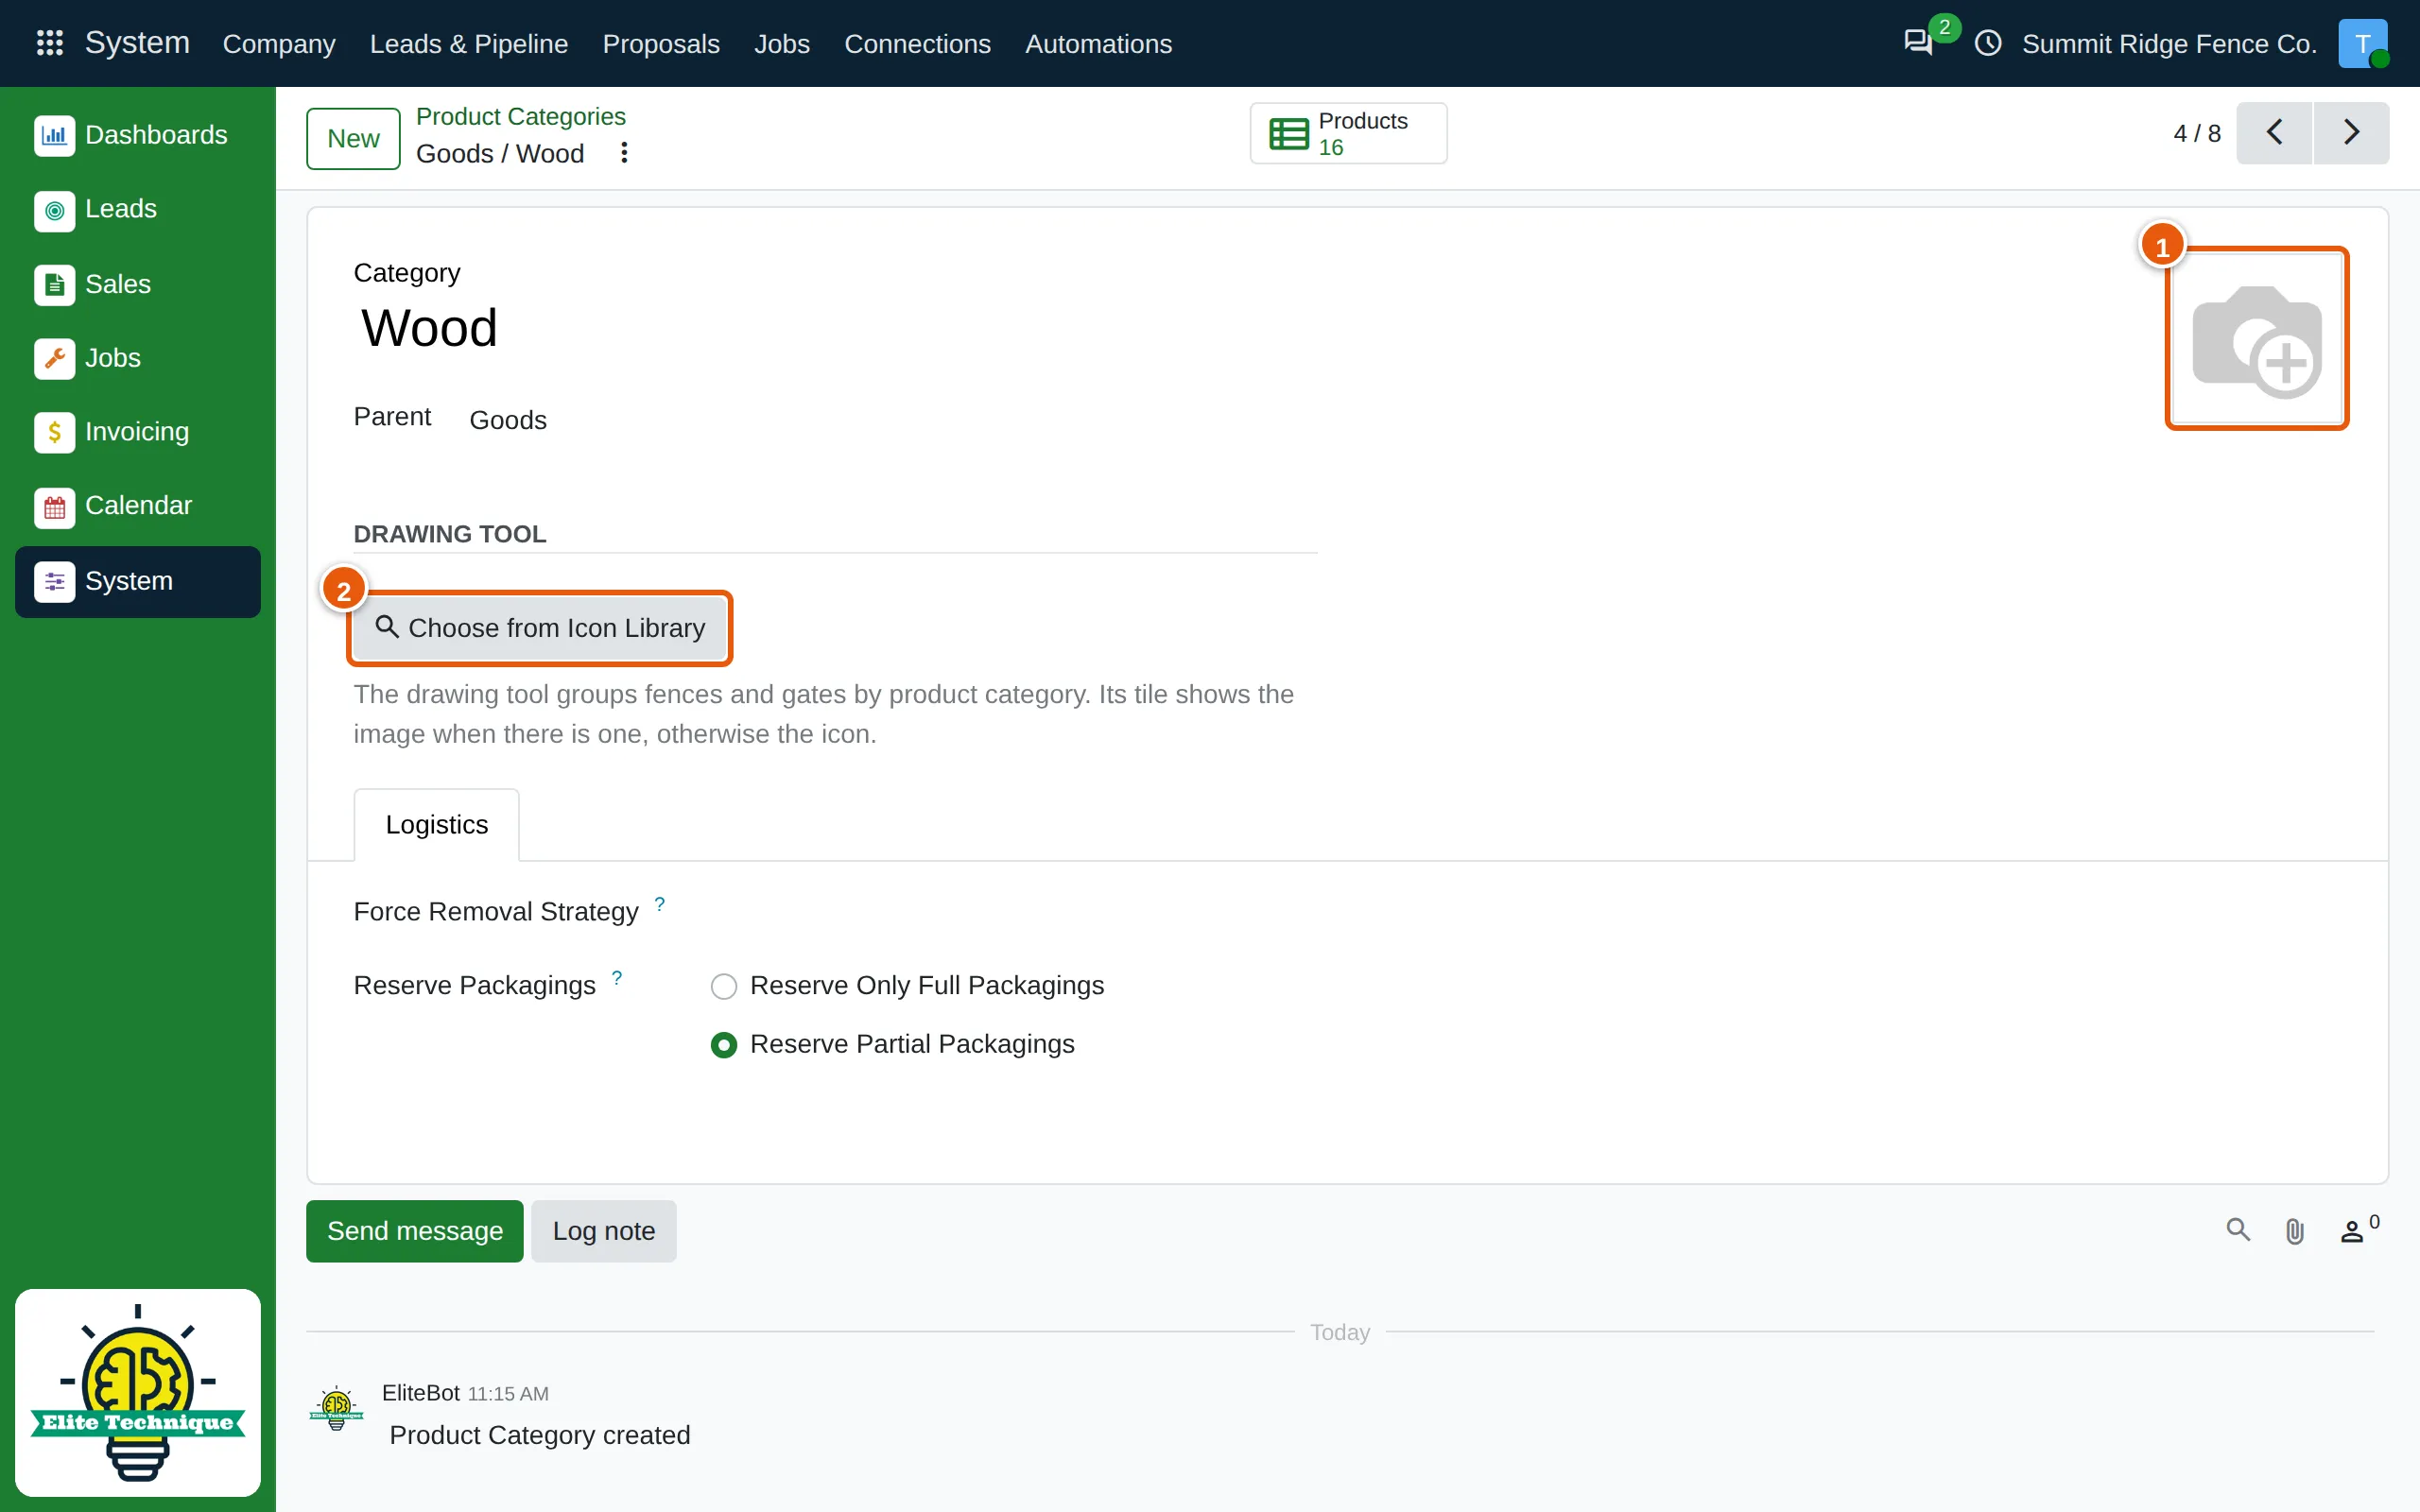
Click a category, for example Wood. Give its tile a picture — either upload your own image (1), or click Choose from Icon Library (2). The drawing tool shows the image when there is one, otherwise the icon. With neither, the tile shows the category’s name.
-
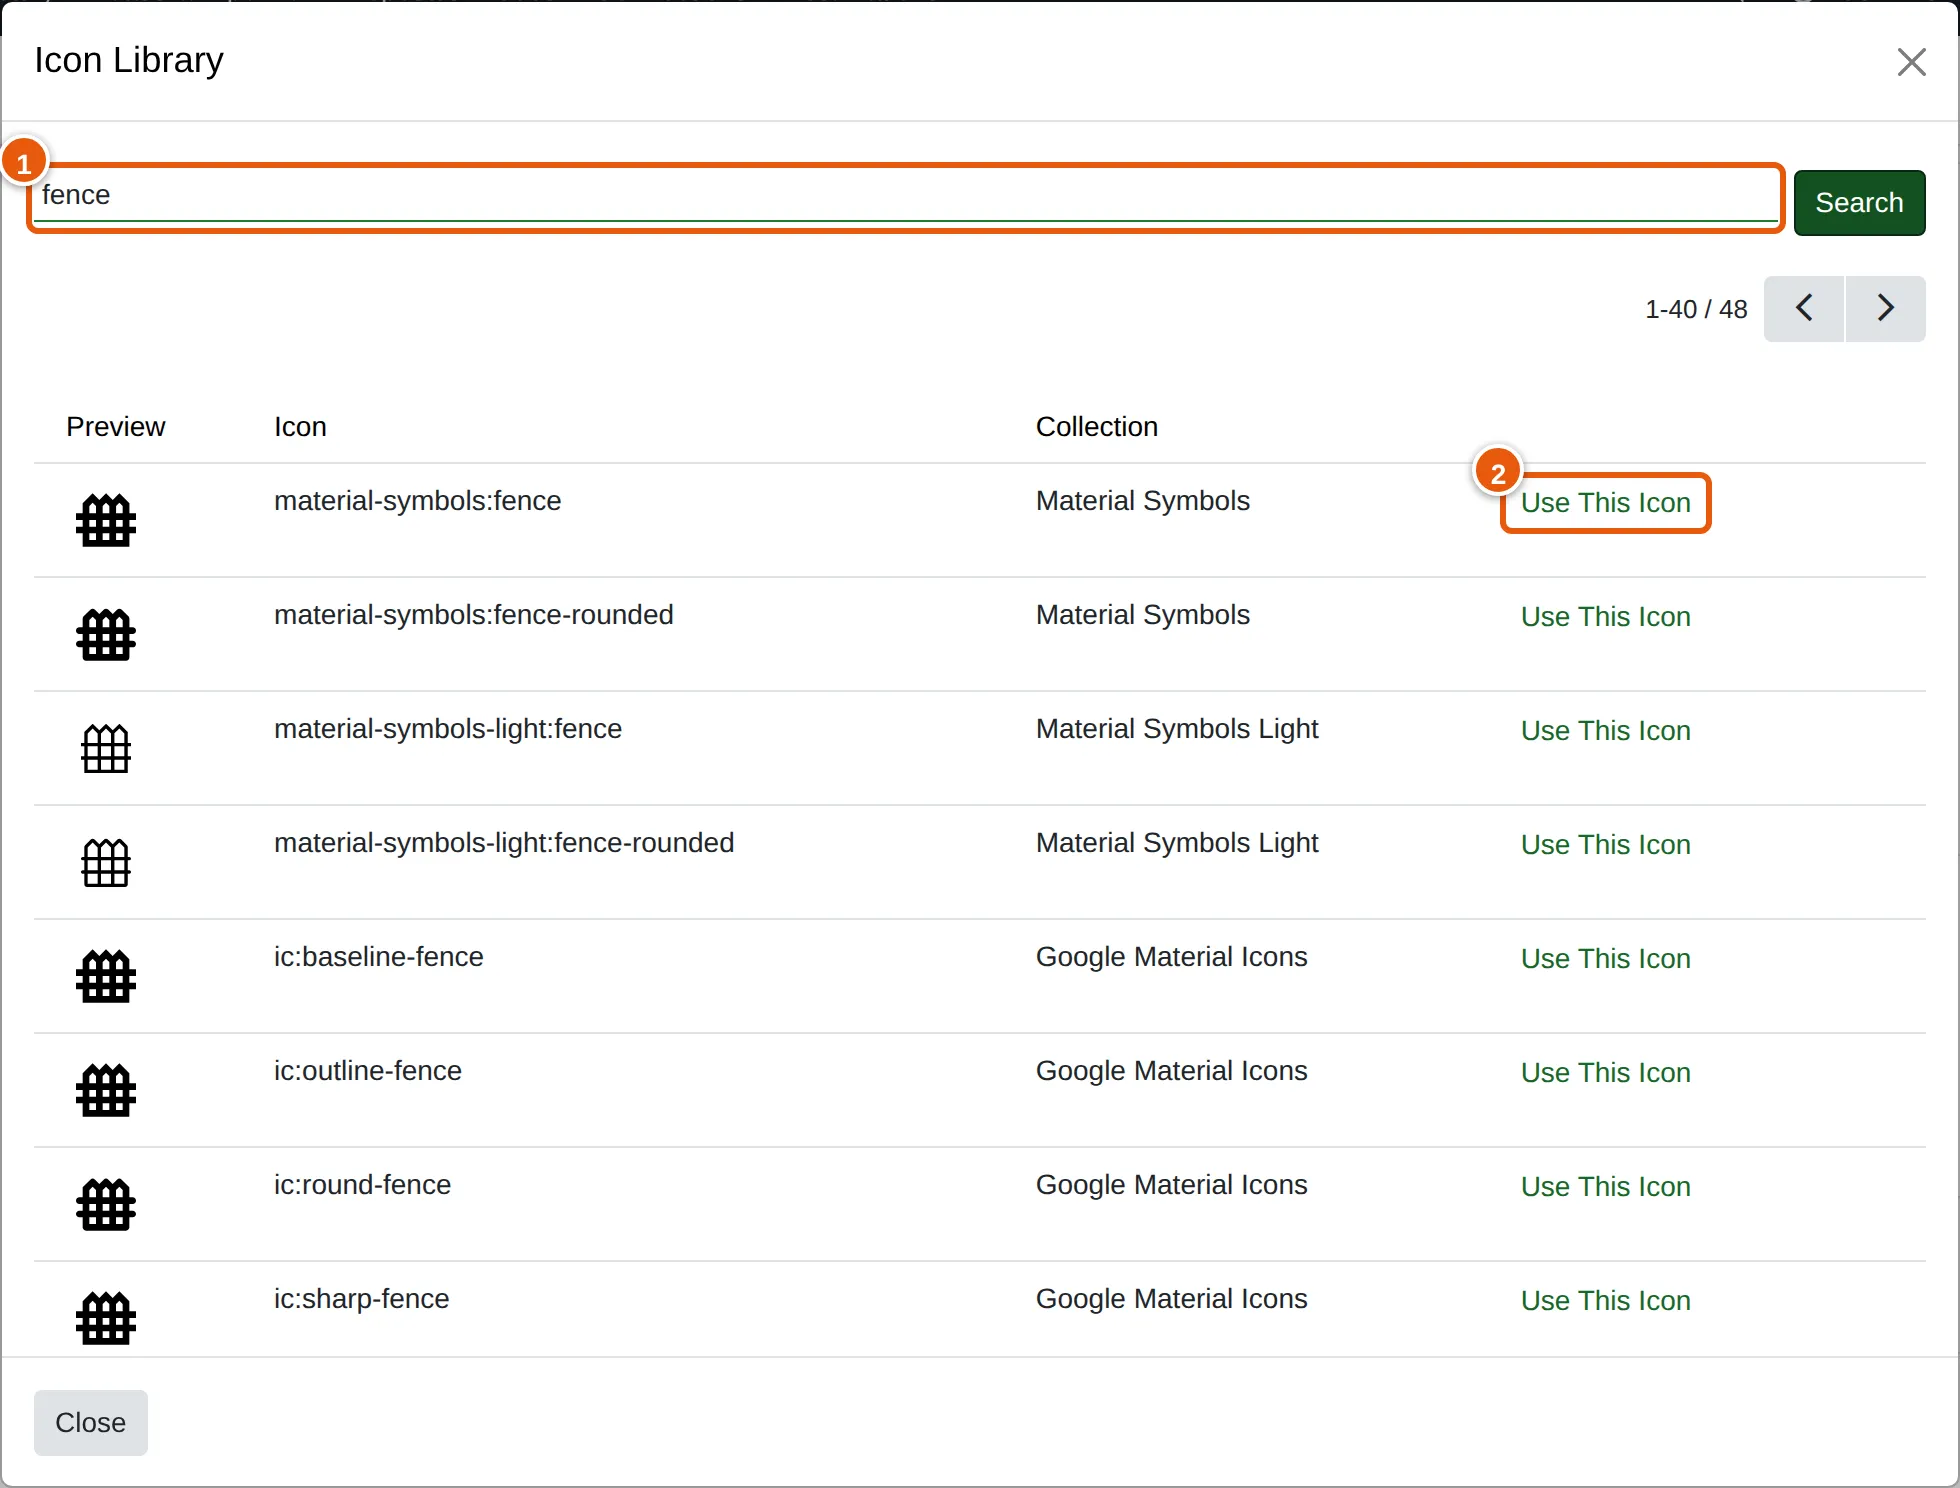
In the Icon Library, type a word (1), for example fence, and click Search. Click Use This Icon (2) beside the one you want.
-
The icon (1) now shows on the category. Click the cloud icon at the top to save.
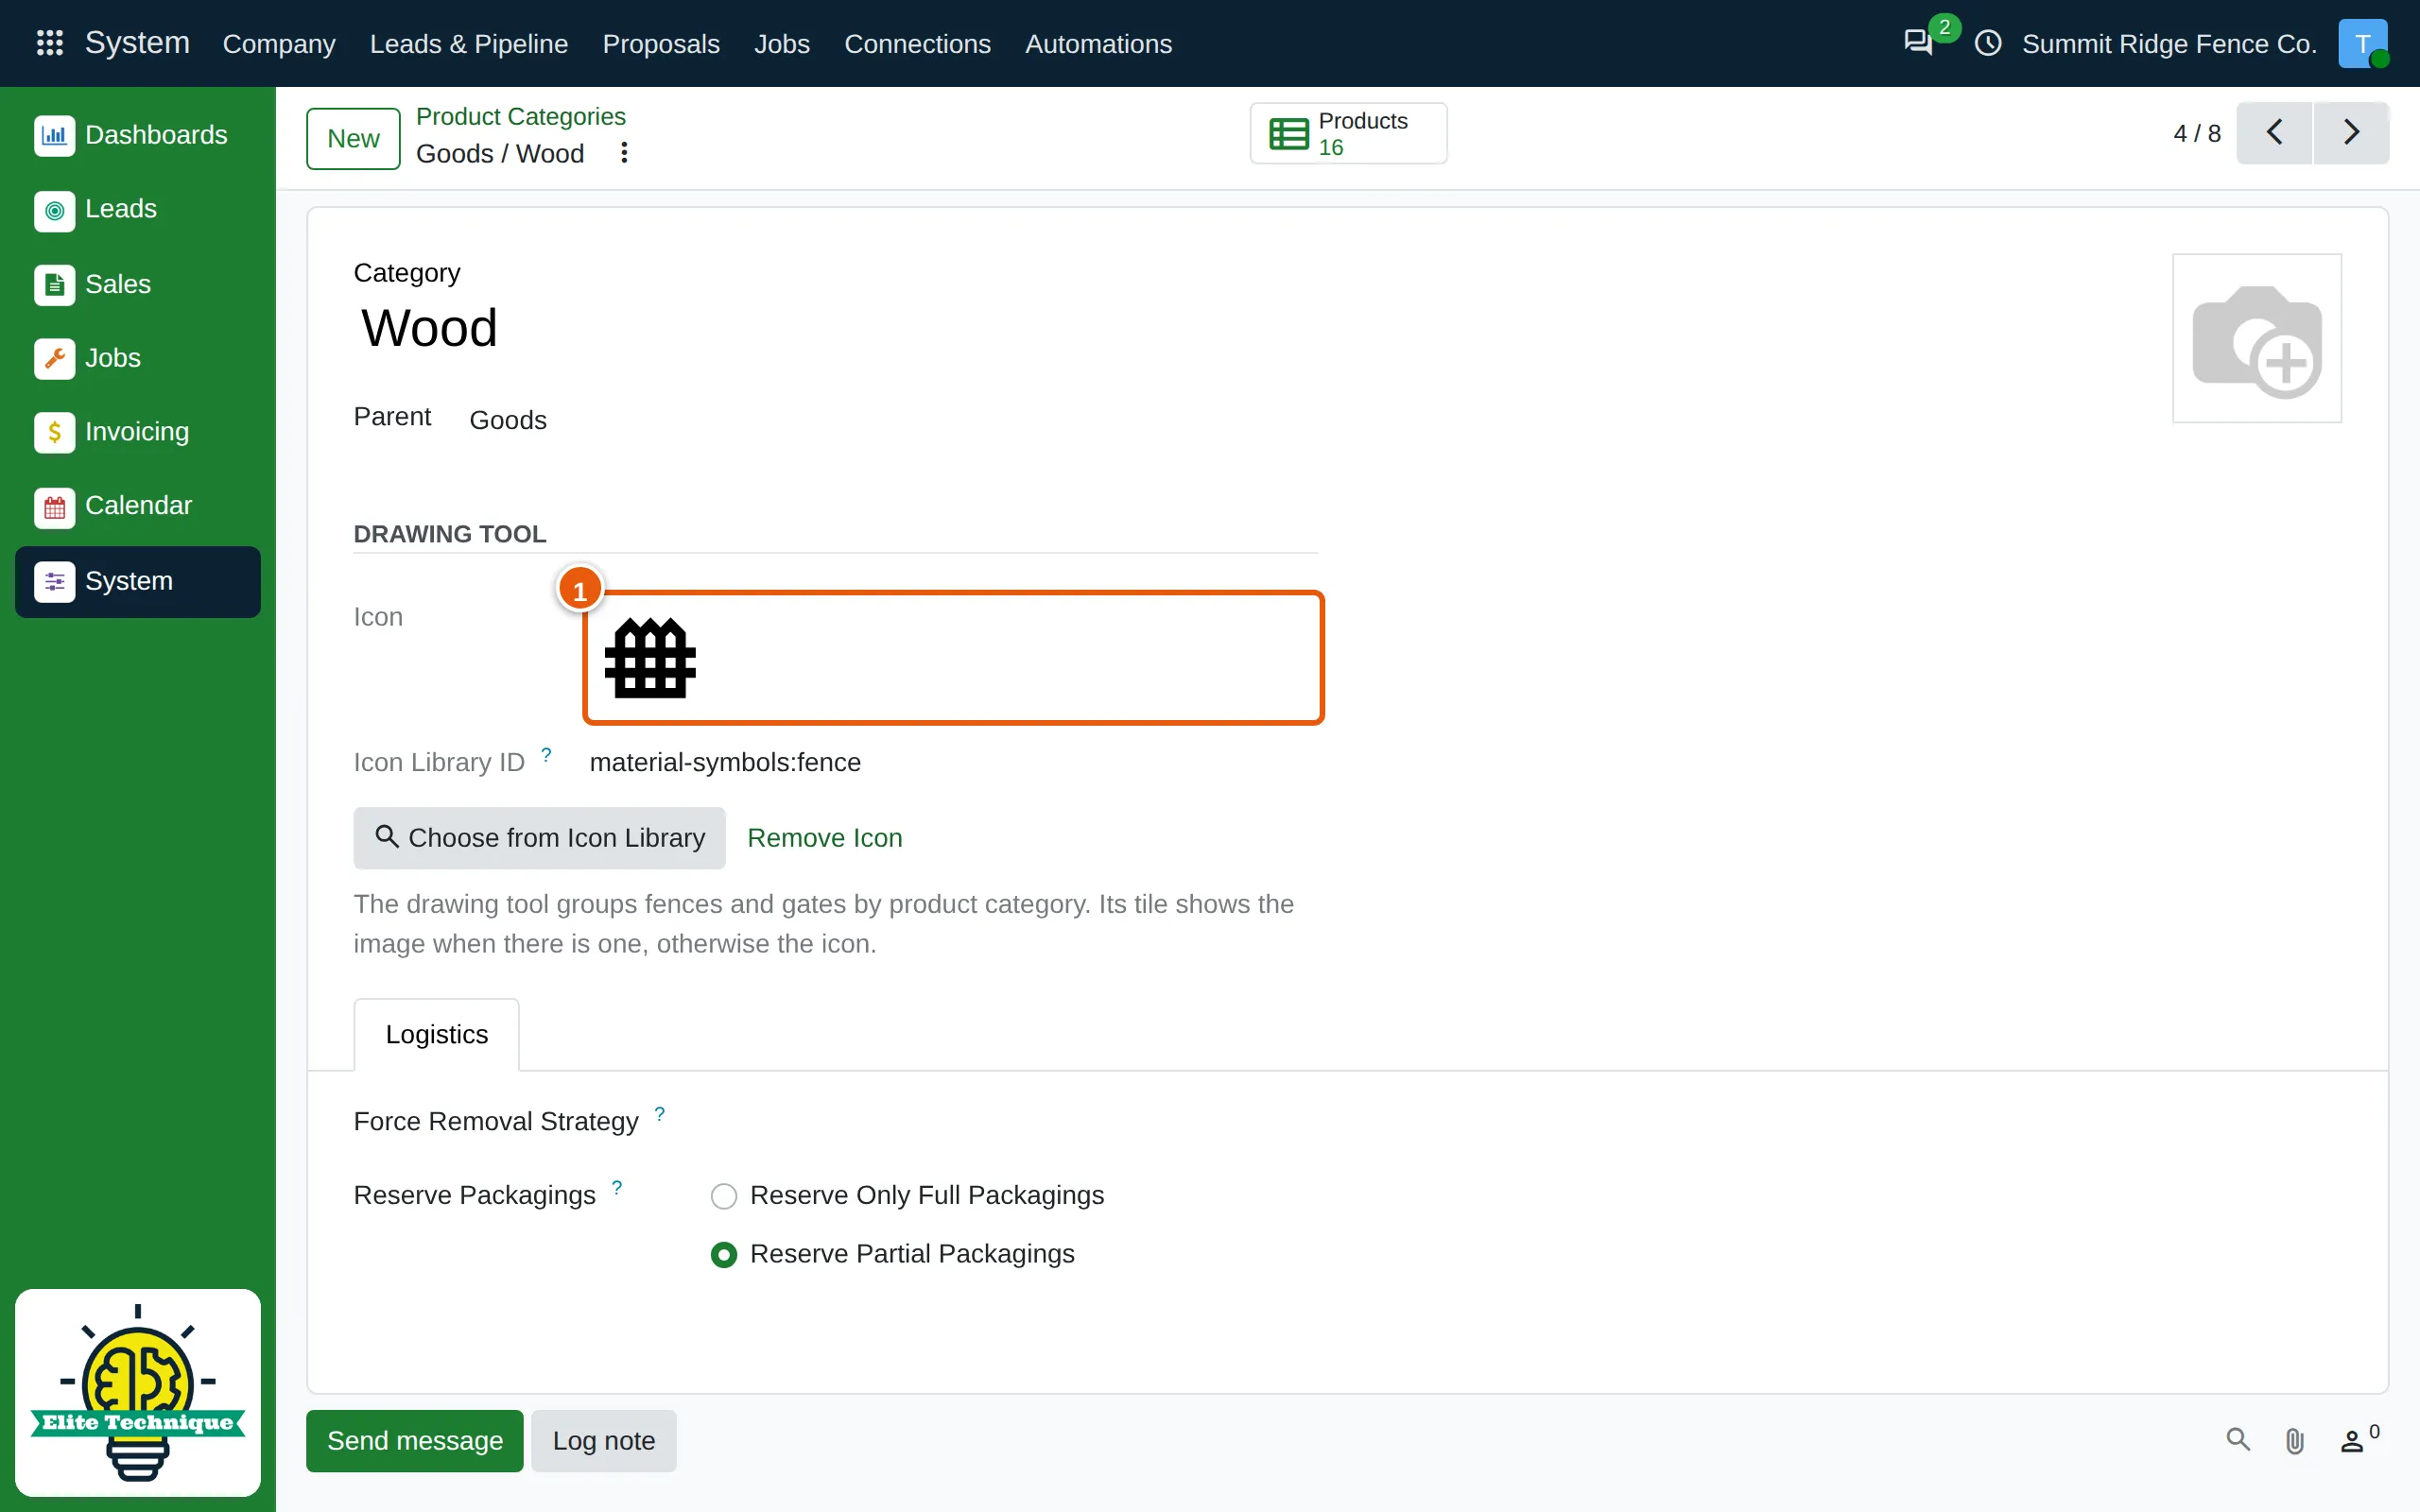
Changed your mind? Choose from Icon Library picks another; Remove Icon takes it off.
Choose a product’s category
Section titled “Choose a product’s category”-
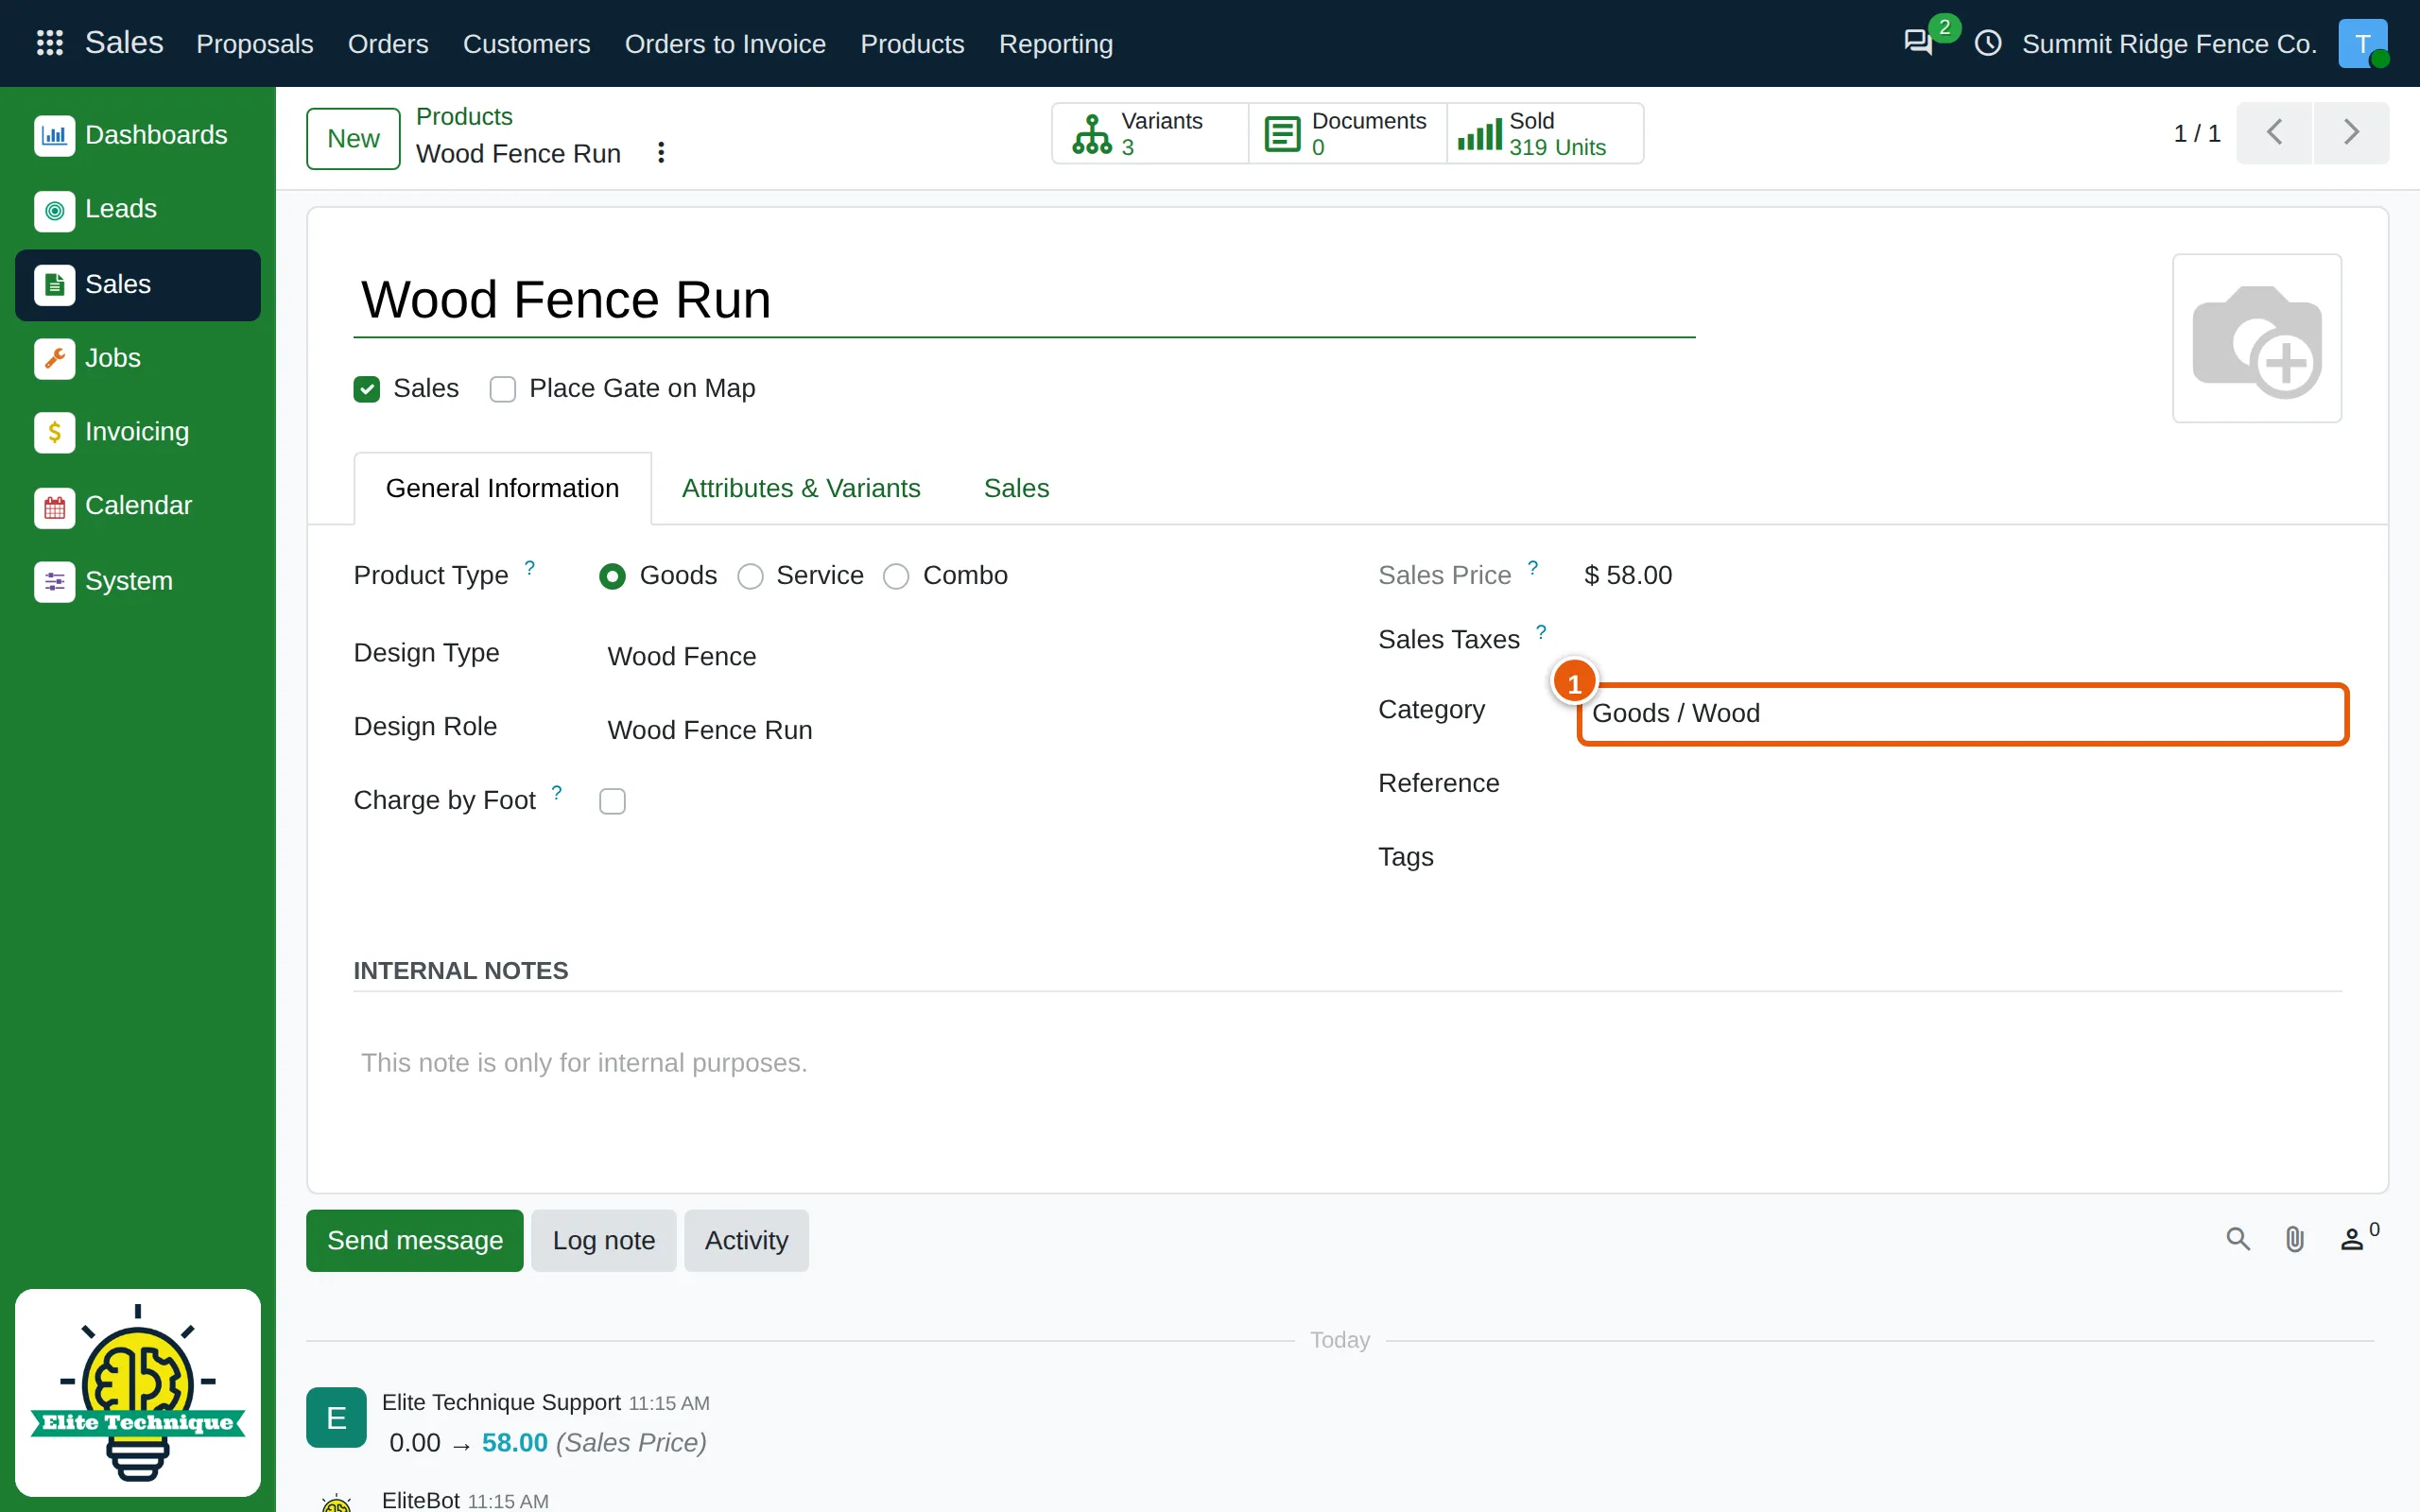
Open the product — the fence a template draws, or a gate — from Sales › Products. Its Category (1) decides the tile it sits under. Change it here and save to move it.
See it in the drawing tool
Section titled “See it in the drawing tool”-
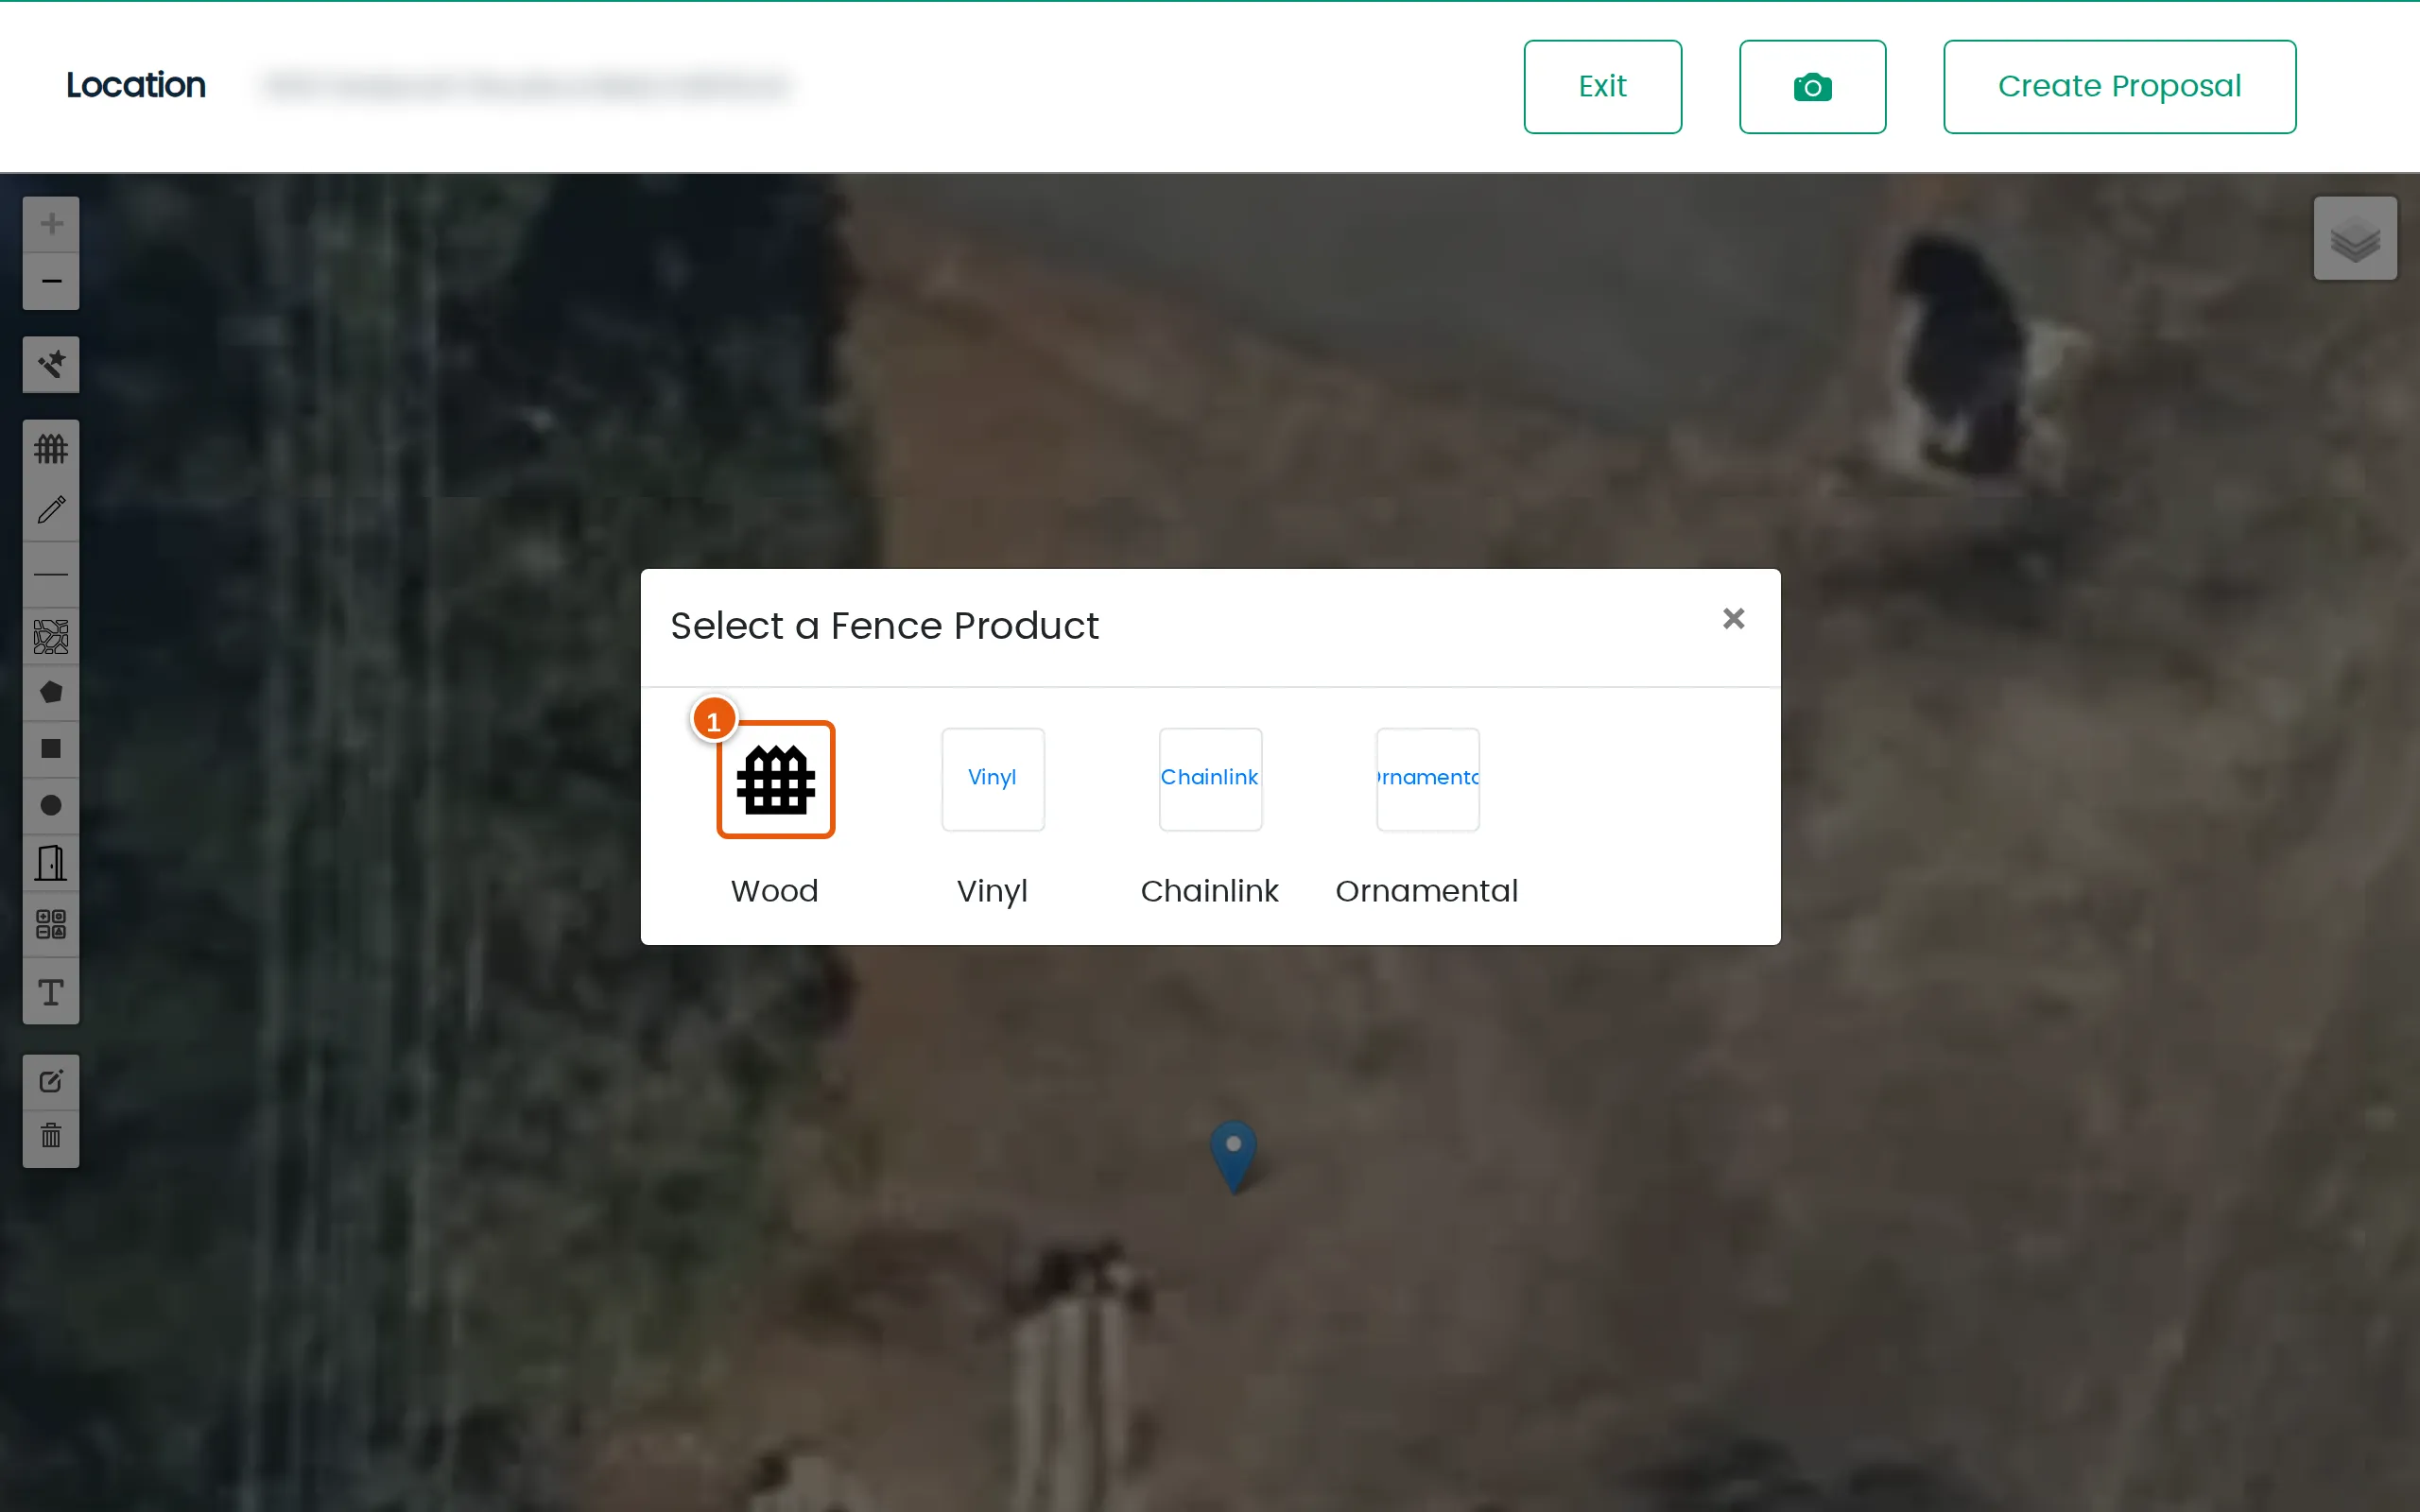
Open an opportunity and click Create Drawing. Select a Fence Product shows your categories, with the tile you just pictured (1).
-
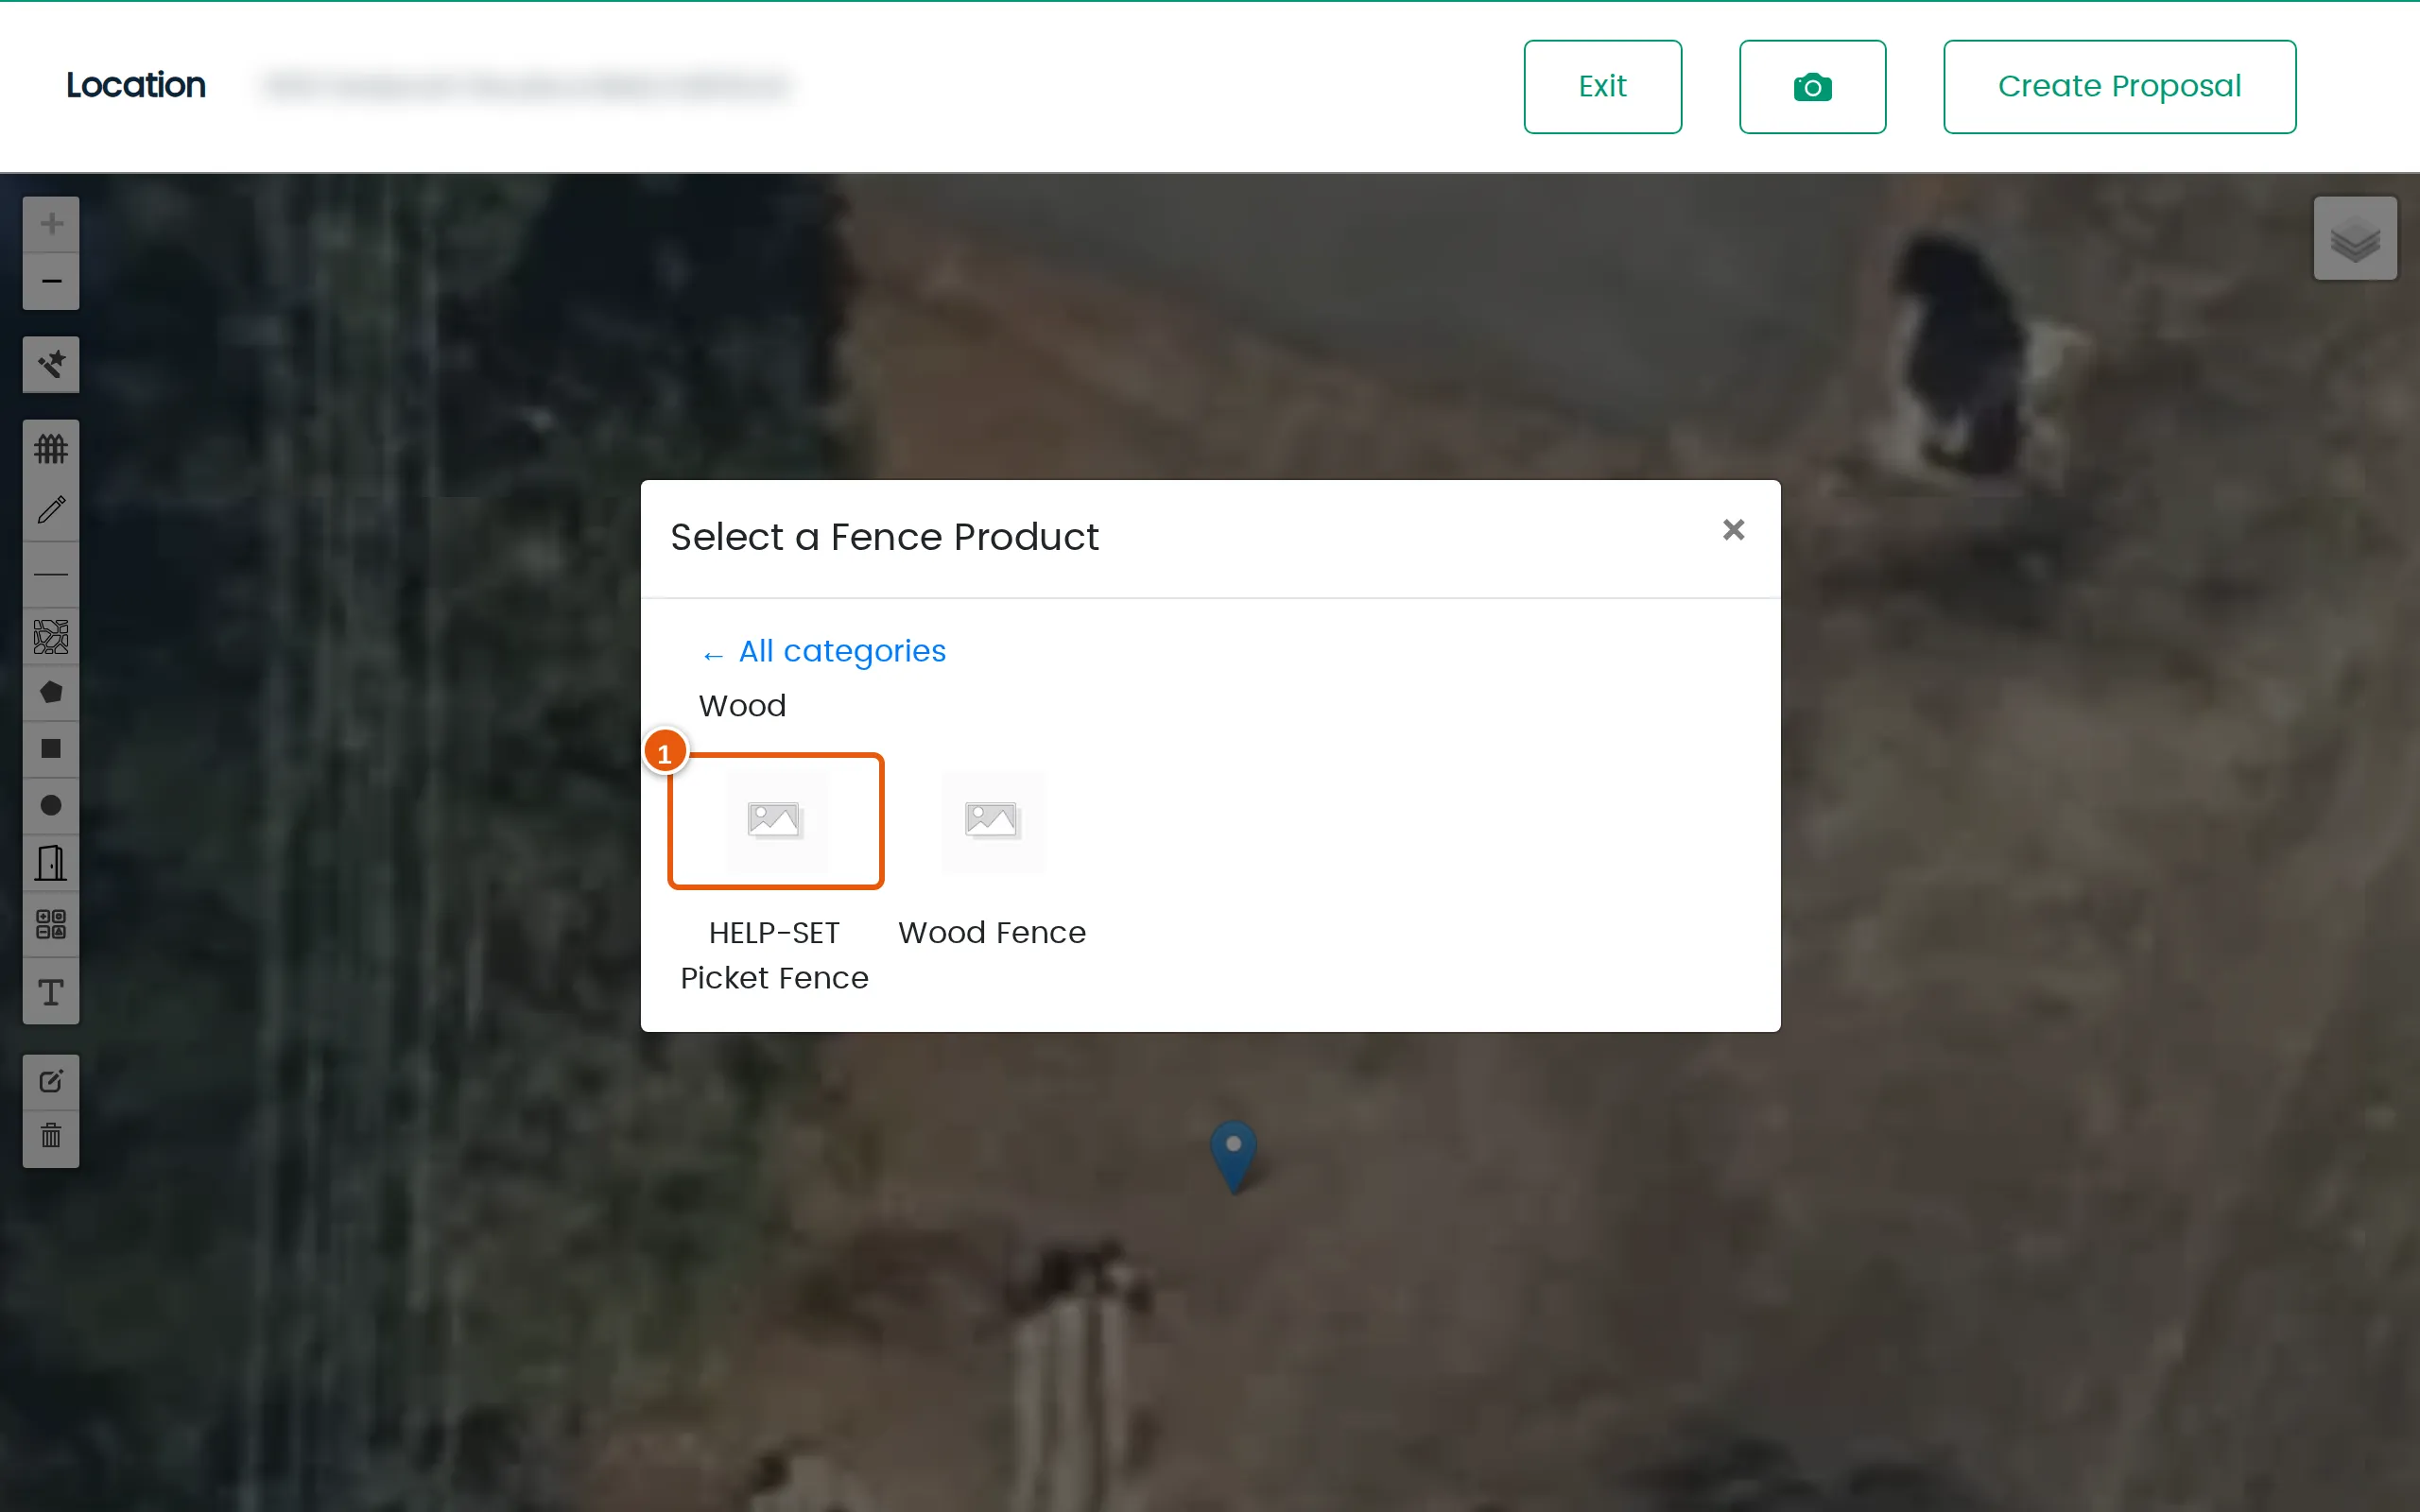
Click it to see its templates (1). ← All categories takes you back to the tiles.
-
Pick a template and draw a run. Then click the gate tool: Select a Gate opens on the same categories. Click one to see its gates (1).